Welcome to our Log Cabin Quilt Tutorial! This timeless pattern is perfect for quilters of all skill levels, offering versatility and creativity. Learn to craft a classic design with ease, transforming fabric scraps into a beautiful, cozy quilt. Ideal for traditional or modern styles, this tutorial guides you through every step, from fabric selection to finishing touches.
Overview of the Log Cabin Quilt Pattern
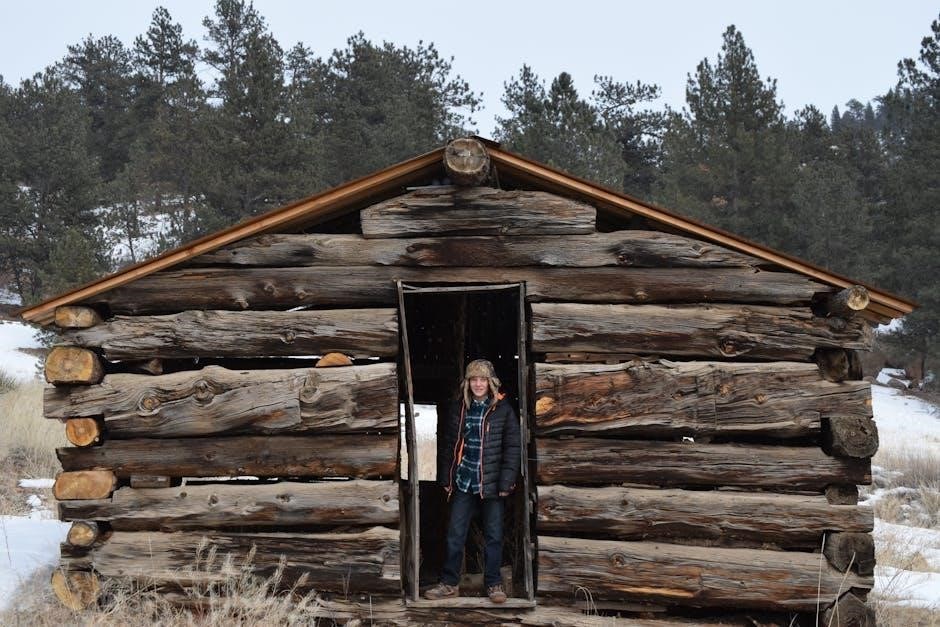
The Log Cabin Quilt Pattern is a timeless and iconic design in quilting, characterized by a central square surrounded by strips of fabric, resembling logs. These strips are sewn in a sequence of rounds, alternating between light and dark fabrics to create contrast and visual interest. The pattern is highly versatile, allowing quilters to experiment with color schemes, layouts, and fabric choices. It is particularly popular for its ability to use scrap fabrics, making it a great option for those looking to reduce waste. The Log Cabin design can be arranged in various configurations, such as straight or curved layouts, and is suitable for both traditional and modern quilting styles. Its simplicity and creative potential make it a favorite among quilters of all skill levels.
History and Significance of the Log Cabin Quilt
The Log Cabin quilt pattern has a rich history dating back to the 1860s in the United States, gaining popularity during the Civil War era. Its design, featuring a central square surrounded by strips of fabric, symbolizes the hearth of a home, with traditional red centers representing warmth and yellow centers signifying a welcoming light. Historically, Log Cabin quilts were also tied to the Underground Railroad, where a quilt with a black center might signal a safe house for escaping slaves. The pattern’s origins may trace back to ancient Egypt, where similar designs were found in fabric wrappings. Today, the Log Cabin quilt remains a beloved and symbolic design, connecting quilters to a storied past while allowing for modern interpretations and creativity.
Tools and Materials Needed
Gather essential tools and materials for your Log Cabin quilt, including fabric strips, batting, thread, sewing machine, rotary cutter, and quilting needles for precise stitching.
Fabric Selection and Requirements
Selecting the right fabrics is crucial for a Log Cabin quilt. Choose contrasting light and dark fabrics to create visual interest and depth. The center square can be a bold color like red or yellow, symbolizing tradition. Use 2.5-inch wide strips for a classic look or vary sizes for a scrappy design. Jelly rolls are ideal for efficiency, offering pre-cut strips. For a queen-size quilt, you’ll need about 4 jelly rolls or 12 yards of fabric. Ensure fabrics are tightly woven cotton for durability. Calculate yardage based on block size and quilt dimensions. Light and dark fabrics should be balanced to maintain the pattern’s integrity. This method is perfect for using scraps, making it a great stash-busting project. Plan your palette to achieve the desired aesthetic, whether traditional or modern.
Essential Quilting Tools
To create a Log Cabin quilt, you’ll need a few essential tools. A sewing machine is vital for stitching fabric strips efficiently. Rotary cutters and mats are perfect for accurately cutting fabric strips to size. A quilting ruler helps measure and trim fabric precisely. Cotton thread in matching colors ensures seamless blending. Sharp scissors are handy for trimming small pieces. Pins are necessary for aligning fabric strips before sewing. An iron and ironing board are crucial for pressing seams, ensuring a crisp finish. Optional tools include a seam ripper for corrections and quilting gloves for better control. Having these tools ready will streamline your quilting process and ensure professional results. Keep your workspace organized and your tools within reach to enjoy a smooth sewing experience.
Supplies List for the Project
Gather your materials to start your Log Cabin quilt. You’ll need fabric strips in light and dark colors, typically 2.5 inches wide, which can be cut from yardage or pre-cut jelly rolls. For a queen-sized quilt, plan for about 12 yards of fabric. Include a center square fabric, usually 2 inches wide, and contrasting strips for the logs. Cotton batting is essential for the quilt’s insulation. Select a backing fabric that complements your quilt top. Thread should match your fabrics to blend seams. Additional supplies include quilting needles, pins, and binding fabric for the edges. Optional materials like quilting gloves or a rotary cutter can enhance your workflow. Ensure all fabrics are pre-washed to avoid shrinkage issues. Organize your supplies to streamline the sewing process and enjoy creating your Log Cabin quilt.
Fabric Preparation
Fabric preparation is crucial. Wash, dry, and iron fabrics to prevent shrinkage. Cut strips from yardage or use pre-cut jelly rolls. Sort into light and dark groups for design accuracy.
Calculating Fabric Requirements
Calculating fabric for a Log Cabin quilt involves determining yardage based on quilt size and block dimensions. For a traditional block, estimate fabric needs by considering the center square and surrounding logs. Each block typically requires strips of varying lengths, with wider strips for outer rounds. A standard block size of 12″ x 12″ may need 1-2 yards of fabric per block, depending on scrap usage. Jelly rolls are convenient, as each roll provides enough strips for multiple blocks. Add extra fabric for borders and binding. Consider seam allowances and fabric width when cutting. Scrap-friendly designs allow flexibility, but precise calculations ensure minimal waste. Plan ahead to match light and dark fabrics proportionally for balanced contrast.
Cutting Fabric Strips
Cutting fabric strips is a crucial step in creating a Log Cabin quilt. Start by sorting fabrics into light and dark categories for contrast. Use a rotary cutter and mat for precision, ensuring accurate cuts. Strips are typically 2.5″ wide, but sizes can vary depending on the block dimensions. For a standard block, cut strips slightly longer than needed to allow for trimming during assembly. Jelly rolls, pre-cut into 2.5″ strips, are ideal for this pattern. Label each strip to keep track of their placement in the block. To maintain consistency, align fabric edges carefully before cutting. This step sets the foundation for a neat and professional-looking quilt. Always double-check measurements to avoid waste and ensure a smooth sewing process.
Sorting Fabric into Light and Dark
Sorting fabric into light and dark categories is essential for achieving the classic Log Cabin design. Separate fabrics based on their color intensity, placing lighter shades in one group and darker tones in another. This contrast creates visual interest and defines the “logs” around the center square. For a balanced look, ensure a mix of patterns and solids within each category. Light fabrics will form one side of the block, while dark fabrics will form the other. This step ensures harmony and symmetry in the final quilt. Proper sorting prevents color clashes and enhances the traditional appeal of the Log Cabin pattern. It also makes the assembly process more efficient, as you can systematically add strips to the block.
Constructing the Quilt Blocks
Begin with the center square, then add logs in rounds, pressing seams toward darker fabrics for a crisp finish. Repeat until blocks reach desired size for precision.
Creating the Center Square
The center square is the heart of the Log Cabin quilt block. Traditionally, it’s a small fabric piece, often red or yellow, symbolizing the hearth or a welcoming light. To start, cut a square of fabric to your desired size, typically around 2-6 inches, depending on the block size. Place it right side up on your work surface. This square sets the tone for your block, so choose a fabric that stands out. For a modern twist, you can use a focal print or a contrasting color. Ensure the square is accurately cut to maintain symmetry, as it forms the foundation for the surrounding logs. Press the square neatly before adding the first logs to ensure crisp seams.
Adding the First Round of Logs
Once the center square is ready, it’s time to add the first round of logs. Cut four fabric strips, ensuring two are light and two are dark, slightly longer than the center square’s sides. Sew the first light strip to the top of the center square, right sides together, using a 1/4-inch seam. Press the seam toward the dark fabric. Next, sew the dark strip to the right side of the square, pressing again. Repeat this process with the remaining light and dark strips for the bottom and left sides. Trim excess fabric after each addition for accuracy. This foundational round sets the quilt’s tone, so align strips carefully and press seams crisp for a professional finish. This step marks the exciting beginning of your Log Cabin quilt’s growth.
Adding Subsequent Rounds of Logs
After completing the first round, subsequent rounds of logs are added in a similar manner, alternating between light and dark fabrics. For each new round, cut strips slightly longer than the current block’s sides. Sew the first strip to the top, aligning edges carefully, then press the seam toward the dark fabric. Next, sew the opposing strip to the right side, ensuring it matches the top strip’s length. Continue this process for the bottom and left sides, always pressing seams consistently. With each round, the block grows, creating a dynamic, layered effect. Maintain consistent strip widths and alignment to ensure a professional finish. Rotate the block as needed to keep seams straight and fabric evenly distributed. This repetitive process builds the quilt’s signature look, blending light and dark fabrics harmoniously. Each round brings your quilt closer to completion, showcasing your precision and creativity.
Pressing Seams for Accuracy
Pressing seams is a critical step for achieving accuracy and a professional finish in your Log Cabin Quilt. After sewing each strip, immediately press the seam to ensure crisp, sharp folds. Use a hot iron with steam to flatten the fabric, pressing the seam toward the darker fabric to prevent it from showing on the right side. This technique helps maintain a clean appearance and avoids bulkiness. Always press as you go, rather than waiting until the block is complete, to keep seams straight and prevent distortion. For even better results, use a pressing mat or ironing board with a ruler to trim excess fabric and ensure straight edges. Consistent pressing will make your quilt blocks lie flat and align perfectly when assembling the quilt top.
Assembling the Quilt Top
Arrange completed Log Cabin blocks on a design wall or flat surface to achieve your desired layout. Sew blocks together with 1/4-inch seams, pressing as you go to ensure accuracy. Add borders to frame the quilt, matching seams carefully for a polished finish.
Arranging Completed Blocks
Once all Log Cabin blocks are complete, arrange them on a design wall or large, flat surface to visualize the final layout. Experiment with different configurations to achieve balance and harmony in your quilt top. Consider alternating block orientations to create dynamic patterns. Ensure light and dark fabrics are distributed evenly to maintain visual interest. If desired, rotate blocks to form traditional designs like “Straight Furrows” or “Chevron.” Use a measuring tape or ruler to align blocks precisely. Pin or mark the arrangement to guide sewing. For a cohesive look, ensure all blocks are squared and seams are matched. This step is crucial for a professional finish. Sew blocks together, pressing seams as you go to maintain accuracy and a crisp appearance.
Sewing Blocks Together
Sewing Log Cabin blocks together requires precision to ensure a professional finish. Begin by aligning the edges of two blocks, matching seams and corners carefully. Use pins to secure the blocks, especially at intersections, to maintain accuracy. Place the blocks under the sewing machine, ensuring the seam allowance is consistent (typically 1/4 inch). Sew the blocks together in rows, pressing seams as you go to avoid bulk. For added stability, use a walking foot or even feed to guide the fabric smoothly. Backstitch at the beginning and end of each seam for durability. Press the completed row to flatten the seams, then repeat the process for subsequent rows. Trim any excess fabric at the edges to ensure a smooth finish. This step brings your quilt top together, ready for borders or quilting.
Adding Borders
Adding borders to your Log Cabin quilt enhances its visual appeal and adds a professional finish. Begin by measuring the quilt top to determine border width and fabric requirements. Cut border strips to the desired width, ensuring they match the quilt’s length and width. Sew the side borders first, aligning edges and using a 1/4-inch seam allowance. Press seams outward to minimize bulk. Next, attach the top and bottom borders, ensuring they fit snugly. For a polished look, press all border seams and trim excess fabric. Consider using contrasting colors for a cohesive design. Optional embellishments, like pieced logs or embroidery, can add a rustic touch. Borders not only frame the quilt but also allow for creative expression, making your Log Cabin quilt truly unique and personalized. This step completes the quilt top, readying it for quilting and binding.
Quilting and Finishing
Quilting and finishing transform your Log Cabin quilt top into a completed masterpiece. Sandwich the quilt top with batting and backing, then quilt using straight lines or decorative stitches. Binding neatly secures the edges, completing your quilt.
Sandwiching the Quilt
Sandwiching the quilt involves layering the quilt top, batting, and backing fabric together. Start by laying the backing fabric flat on a large surface, smoothing out wrinkles. Place the batting on top, ensuring it aligns evenly with the backing. Finally, add the quilt top, right side up, and smooth it thoroughly. Use curved safety pins or spray basting to secure the layers, working from the center outward to avoid air pockets. Ensure all edges align and the corners are square. Trim excess batting and backing fabric evenly around the quilt. This step prepares the quilt for quilting, ensuring a smooth and even surface for stitching. Proper layering is crucial for a professional finish and long-lasting durability.
Quilting Patterns and Techniques
Quilting patterns bring texture and visual interest to your Log Cabin Quilt. Straight-line quilting, such as diagonal or horizontal lines, offers a modern, clean look. For a traditional feel, consider stitch-in-the-ditch quilting, which follows the seams and emphasizes the block structure. Free-motion quilting allows for creative designs like feathers or flowers, adding an artistic touch. Using a walking foot or free-motion foot on your sewing machine can help achieve smooth, consistent stitches. Choose patterns that complement the quilt’s design and fabric choices. Dense quilting adds durability, while sparse quilting creates a soft, snuggly texture. Always test your chosen technique on scrap fabric to ensure accuracy. The quilting process is where your quilt truly comes to life, blending functionality and beauty in every stitch.
Binding the Quilt
Binding is the final step to complete your Log Cabin Quilt, protecting the edges and adding a decorative finish. Cut binding strips 2.5 inches wide from coordinating fabric. For a double-fold binding, fold strips in half lengthwise and sew together, leaving a small seam allowance. Attach the binding to the quilt’s edges, aligning raw edges and sewing with a ¼-inch seam. Miter corners for a professional look. Fold the binding over to the quilt back and hand-stitch or machine-sew in place. For a rustic feel, consider a pieced binding using leftover log strips. Always press the binding before attaching to ensure crisp folds. This step seals your quilt’s edges and enhances its overall appearance, providing a polished finish to your Log Cabin Quilt.
Tips and Variations
Press seams toward dark fabrics to hide them. Use scraps for a scrappy look or experiment with alternative layouts. Add embellishments like embroidery or appliqué for uniqueness. Try jelly rolls for quick strip cutting to enhance your Log Cabin Quilt design creatively.
Scrappy Design Ideas
A scrappy Log Cabin Quilt is a fantastic way to use leftover fabrics. Mix various prints and colors for a vibrant, eclectic look. Assign light and dark strips strategically to create contrast. Consider using jelly rolls for pre-cut strips, which simplify the process. To add uniqueness, incorporate fussy-cut centers featuring favorite motifs. Experiment with varying strip widths for different effects. This approach not only reduces fabric waste but also results in a one-of-a-kind quilt. It’s ideal for showcasing cherished fabrics and adding personal touches to your project. The scrappy method keeps the design dynamic and engaging, making each block distinct and special.
Alternative Layouts
Log Cabin Quilt blocks can be arranged in various layouts to create unique designs. The Barn Raising pattern rotates blocks to form a dynamic, zigzag effect, while Straight Furrows aligns blocks in uniform rows for a calm, organized look. A Modern Spin layout alternates block orientations to produce a contemporary, asymmetrical appearance. These designs allow quilters to experiment with visual flow and symmetry. By rotating blocks or varying strip placement, you can achieve distinct patterns that suit your creative vision. These layouts are perfect for quilters who want to explore beyond the traditional Log Cabin design while still honoring its classic appeal.
Embellishments
Embellishments can elevate your Log Cabin quilt, adding personality and texture. Consider embroidering motifs like flowers, birds, or trees to create visual interest. Appliqué accents, such as hearts or stars, can enhance the design. For a rustic feel, use hand-quilting patterns or stamped motifs. Some quilters add decorative stitching along the seams or borders for a polished look. These embellishments allow you to personalize your quilt, making it truly unique. Whether you prefer subtle details or bold statements, embellishments offer endless opportunities to express your creativity and connect with the quilt’s history. They can also highlight the quilt’s narrative, such as the traditional red center symbolizing a hearth. Embellishments transform a classic design into a one-of-a-kind masterpiece, blending tradition with personal flair.
Case Studies and Inspiration
Explore historical Log Cabin quilts, like those linked to the Underground Railroad, and modern interpretations. Discover how quilters have reimagined this classic pattern with unique fabrics and layouts.
Traditional Log Cabin Quilts
Traditional Log Cabin quilts are deeply rooted in history, with origins tracing back to the 1860s in the United States. The design often features a center square, historically red or yellow, symbolizing the hearth or a welcoming light. These quilts were sometimes used as signals in the Underground Railroad, with black center squares indicating safe houses. The pattern gained popularity during the Civil War, with quilters using scraps to create meaningful pieces. The traditional Log Cabin quilt is characterized by its symmetrical arrangement of light and dark fabrics, creating a striking contrast. This classic design has been passed down through generations, with each quilt telling a story of its maker and their era. It remains a beloved choice for quilters seeking to connect with heritage and tradition.
Modern Twists on the Classic Design
Modern quilters have creatively reimagined the traditional Log Cabin pattern, infusing it with fresh styles and techniques. Bold color schemes, contemporary fabrics, and asymmetrical layouts offer a fresh take on the classic design. Many quilters now incorporate scraps and jelly rolls for a vibrant, eclectic look. Some opt for improvisational piecing, abandoning strict measurements for a more organic feel. Others blend the Log Cabin with other patterns, like chevrons or hexagons, for a hybrid design. The use of modern tools and techniques, such as precut strips and sewing machines, has also streamlined the process. These innovations allow quilters to preserve the timeless appeal of the Log Cabin while expressing their personal style, making the pattern as relevant today as it was in the past.
Historical Examples
Log Cabin quilts hold a rich historical significance, with roots tracing back to ancient Egypt and evolving through centuries. In the 1860s, they became a symbol of American culture, particularly during the Civil War. A notable historical example is the use of Log Cabin quilts with black center squares, which signaled safe houses on the Underground Railroad, aiding escaping slaves. These quilts were not only functional but also carried secret messages. The pattern’s versatility allowed it to adapt to different eras, with variations like the “Roof Pattern” in Britain and “Canadian Logwork.” Historical quilts often featured red or yellow centers, symbolizing hearth or welcome lights. These timeless designs continue to inspire modern quilters, bridging the past with contemporary creativity.
Completing a Log Cabin quilt is a rewarding experience, blending tradition with personal creativity. This timeless pattern offers endless possibilities, from classic designs to modern twists. Whether you’re a beginner or an experienced quilter, the Log Cabin quilt allows you to experiment with fabrics, layouts, and embellishments. By following this tutorial, you’ve transformed simple strips of fabric into a stunning, cozy quilt. Be proud of your accomplishment and enjoy the joy of creating something handmade. Display your quilt proudly, knowing it carries a piece of history and your unique touch. Happy quilting, and here’s to your next creative project!